On Sept. 13 and 14, Cecilia S, John B, Tim, Maria T, Katrina, Amy L, and Jane took advantage of an NCPA PD session to get up to speed with Canvas. These one-hour sessions scheduled during office hours are a great way of learning practical knowledge to help you within and without the classroom. Here are ten takeaways from our session:
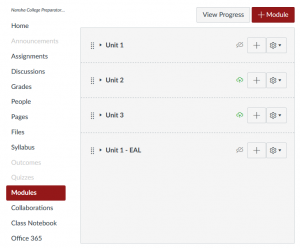
- Use the Modules section to organize your course into subdivisions, for example by unit or by week.

- Add content to your modules using the + button. You can add content in three ways: by uploading a File, adding a Content Page, or linking to an Office 365 document via an External URL. Uploading a file means it’s easy for students to download. Content pages let you embed videos and other web content easily. Linking an O365 document via external URL means you don’t need to make any changes in Canvas when you change your document.
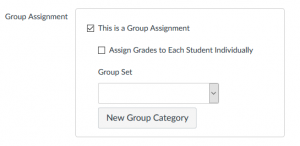
- Yes, you can create group assignments! When creating an assignment, check the This is a group assignment box, and you’ll then have the option to pick groups, randomly assign them, or let students choose their own. You’ll use Group Sets to create sets of groups. You probably want to Require group members to be in the same section regardless.

- Use the People section to add students, TAs, and teachers to your course.
- Curious what your students are seeing? Use Settings > Student View to step into a student’s shoes. Anything you do while in Student View is only temporary and doesn’t affect your actual data.
- You can set up multiple due dates for assignments so that specific sections and even individual students have their own deadlines. If you don’t see a section listed, try typing the number that corresponds to the period (1=A, 2=B, 5=E, etc).
- Speedgrader lets you directly annotate PDFs and Word docs that students have uploaded. You can also attached voice and video comments. Cool.
- Want to use Turnitin? When creating an assignment, the submission type should be External Tool, then click Find and choose Turnitin LTI. That’s it!
- If a student can’t see an assignment or content, the issue 95% of the time is that something isn’t published. Look for this icon and click it to turn it green:
- This great suggestion from Jane: EAL teachers can upload EAL content into unpublished modules, which content teachers can then move into active modules when they choose to use it. Thanks, Jane!
