At NCPA, we are facilitated with the wonderful whiteboard tables but – how can students use it meaningfully? You must have noticed that students are generally engaged when you tell them they can write things down on the tables. Use their excitement as the starting point to create some different learning experiences!
- Input Stage – Notetaking and Question-answering
- Whenever there is a 10 minutes-ish input time – either it’s you talking or a video – ask your students to grab a marker and take notes. You can easily differentiate the notes depending on students’ language proficiency:
- only copy words from subtitle (video)
- write in phrases
- write down content-specific words only
- allow drawing as notes
- allow writing in Chinese
- Whenever there is a 10 minutes-ish input time – either it’s you talking or a video – ask your students to grab a marker and take notes. You can easily differentiate the notes depending on students’ language proficiency:
(Students writing down what they see and what they notice from summative samples)
-
- A tabletop is a perfect place for students to write down answers quickly:
- Do Now – questions to review the previous lesson
- 10-2 – a perfect follow up of input activity: ask students to use the notes to answer a question about the information they just hear
- Preparation for discussion – having a few words written helps ELLs to have oral output
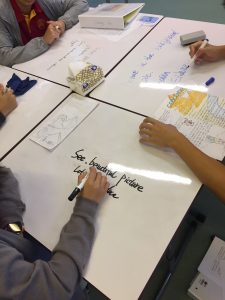
- A tabletop is a perfect place for students to write down answers quickly:
 (Students writing down what they can say to practice persuasive strategies)
- Intake Stage – Information Organizing
- Mindmaps
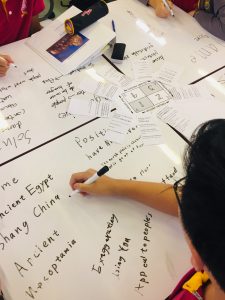
Whenever you want students to summarize or synthesizing a piece of information, mindmap is always a good tool. Allowing students to create mindmaps on their tables gives them a third-space to storage their ideas; it also allows them to quickly share their design or generate conversation around it.
 (Students creating mindmap with a list of translate content vocabulary)
- Sorting and Matching
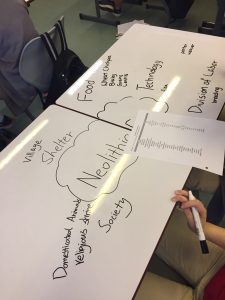
Consider the table to be a giant piece of blank paper – many of the charts you have to print before may not be needed now. If you want students to put words or any information into different categories, they can simply draw the charts, lines, and write the words on their tables.

(Students sorting examples of living in the Neolithic and Paleolithic Age into different categories)
- Comparing and Contrasting
Drawing and filling a T-chart is much easier to be done on a bigger surface. You can also ask students to draw the chart over on two tables. Even more exciting!
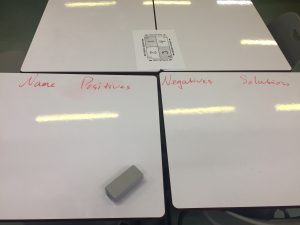
(Example chart to compare different water problems)
- Output Stage – Presenting
- If you think gallery walk is too much preparation, the tables can be easily turned into the materials you need. Ask students to draw, write and design on their tables; then, you write down the numbers of the stations on the tables; when they are ready to present, everything is clear and in order.
- Grouping/Classroom management
- You can number off students by writing it down on their desks. No student has the excuse that they forget the number!
- When you need to introduce a new seating arrangement, write down their names on the desk.
BONUS: Office Lens
A drawback of using the whiteboard table is that students may not be able to save the work they produced. Of course, you can allow them to take a picture of any needed information. To further organize it, using Office Lens can be helpful. The mobile app is free to download and use. Basically, Lens can scan to create documents or pictures. As part of the Office family, Lens is connected with OneDrive, Outlook and many other apps – which allows you to easily export and save your scanned image at a specific online location, or share with another person.
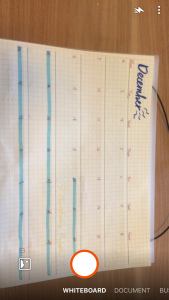 There are three modes: 1. Whiteboard 2. Document 3. Business Card
Whiteboard mode works the best with our tables or any other white/light color background surface.
Document mode is good to use to scan any print materials.
Business Card mode is good for business cards, I suppose.
 A picture is generated after taking a picture of the material. If you are in the Whiteboard mode, the background of the material will be altered to be white. The scanning area will also be larger than in the Document mode.
You can edit, add notes or add another page at this step.
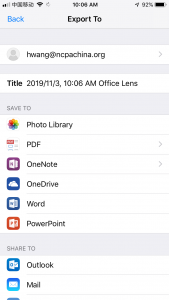 When you press the Done button, Lens will ask you what you want to do with the material. You will need to connect your Microsoft 365 account when it’s the first time you come to this screen. After setting it up, you can choose to either just add it as a picture, or export as a PDF file, or simply send it out with an email.
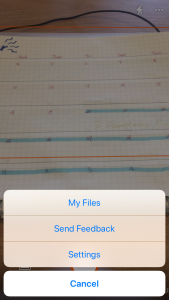
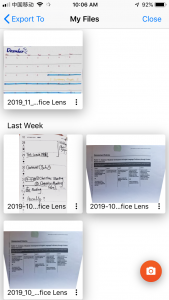
All the files you created can be found on the welcome screen – tap on the three-dot button and then “My Files.”
Acknowledgment:
Special thanks to my co-teaching team @Palacios and @Elsen for always being so creative and flexible to allow the best content + language learning experience to happen in social studies classroom!
Another thank you to @Kelsey for bringing up the useful Office Lens.